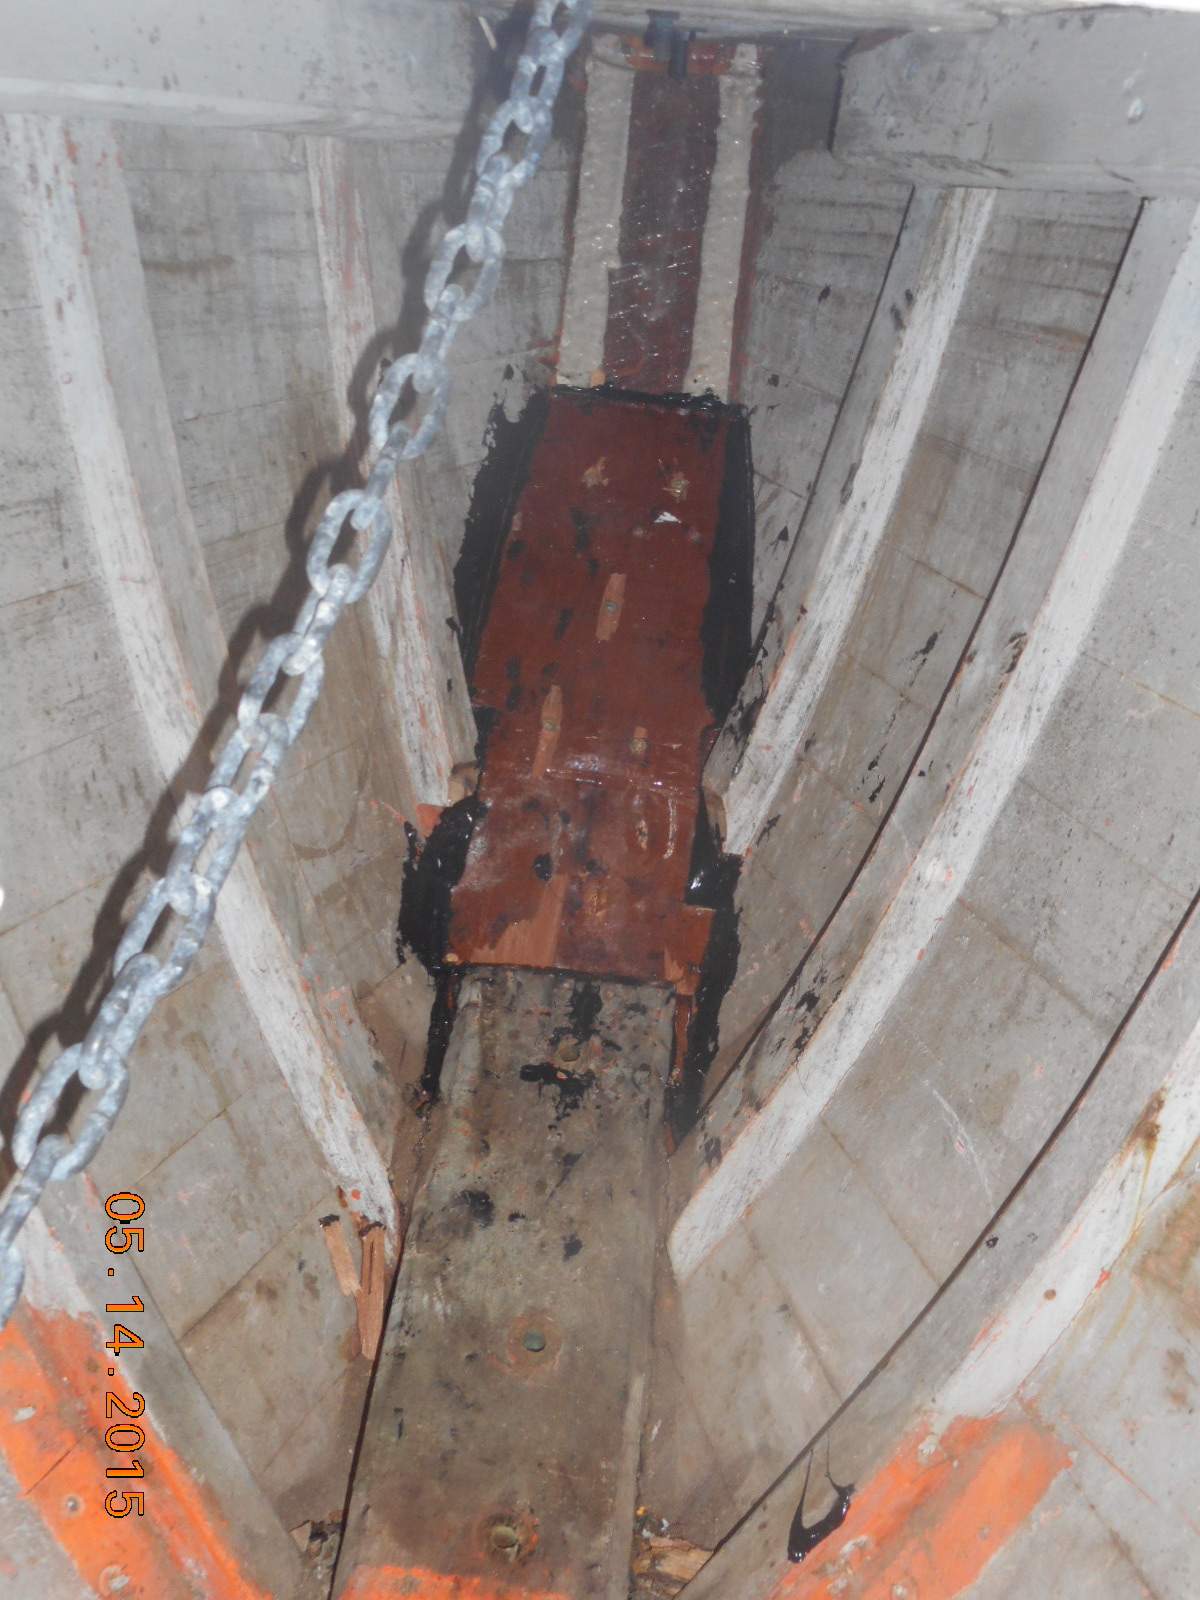
One of the joys of spring is getting the boat ready for the water but this year provided more than the usual sanding, scraping and painting. When I took the covers off there was a disturbing crack in the stem where the stay from the bowsprit connects. I pulled on the stay and it opened wider. Once I had removed the fitting it became clear that nearly the whole stem was rotten. That’s bad. When they build a boat they lay the keel, then attach the stem and transom, and then attach everything to those. The stem is so integral to the boat I wasn’t even sure I could replace it.
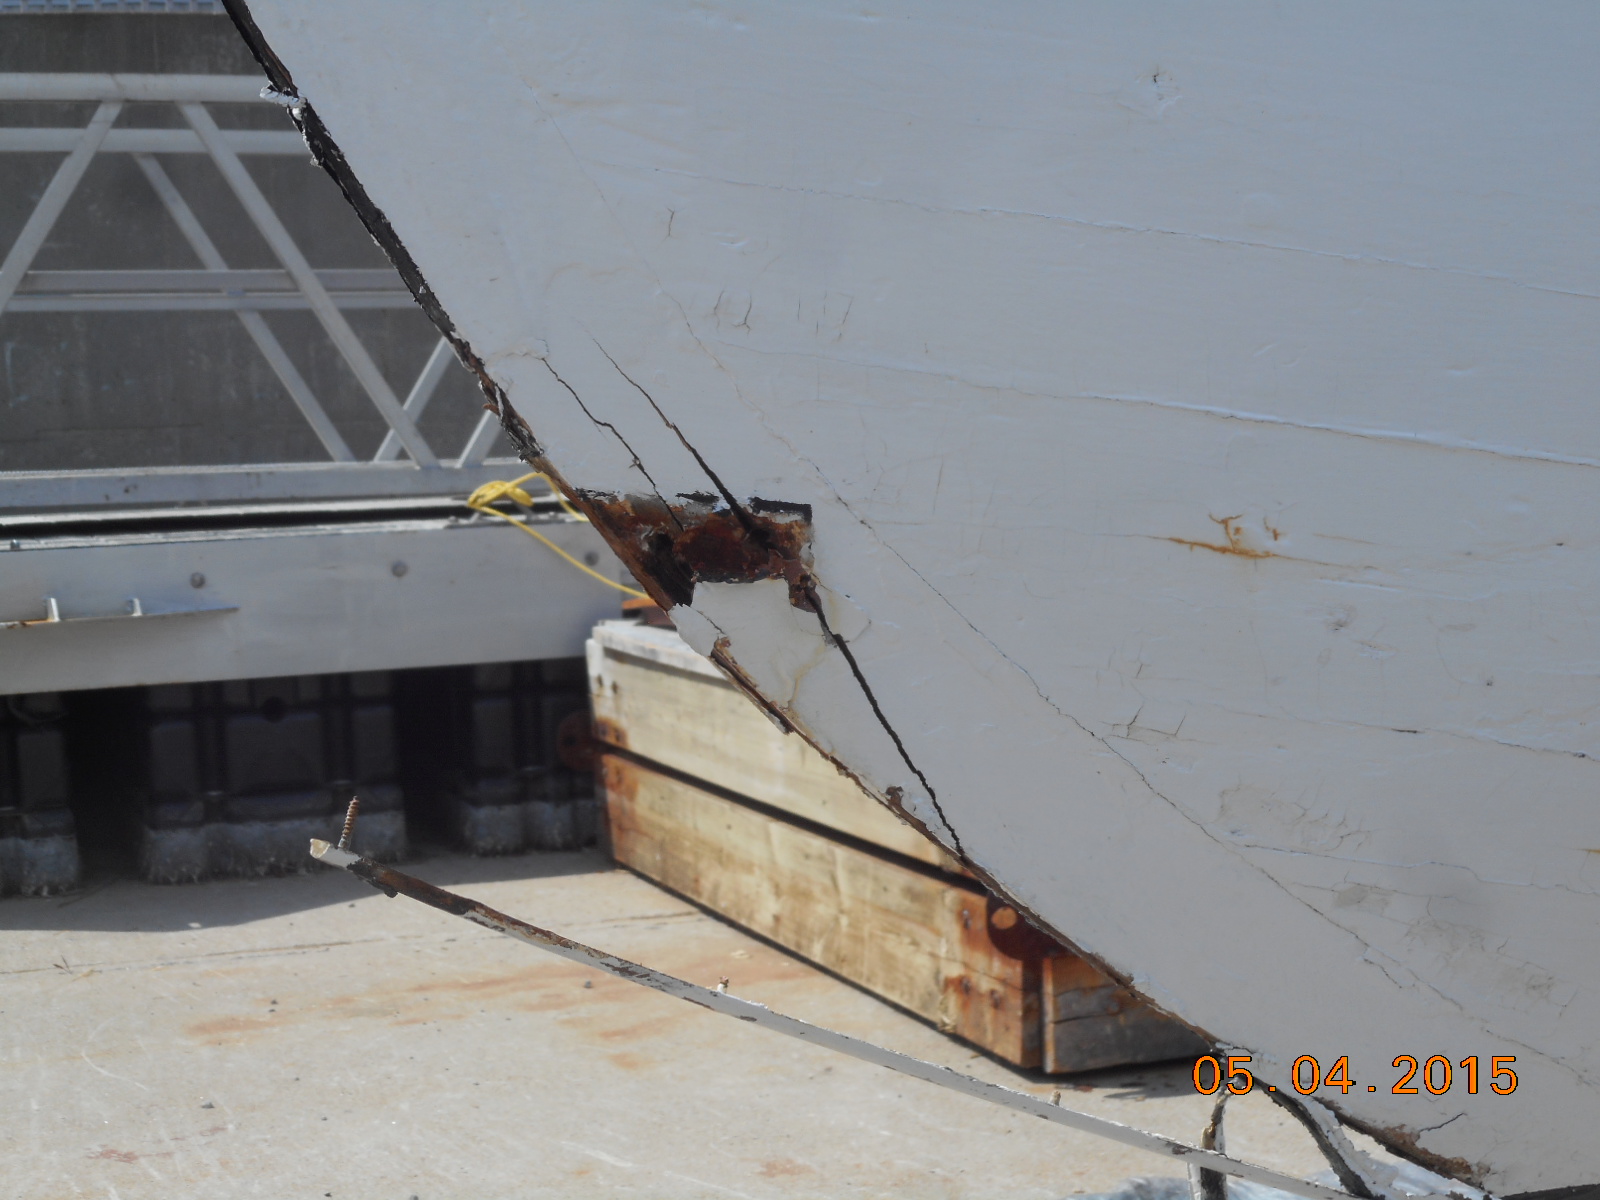
In 2004 I had found rot in the top of the stem and cut it out down to where there was good wood and replaced the top 14 inches with a new piece. Now the rest was gone right down to where it attaches to the keel. And the keel, even though in contact with the stem, was fine.


It is at times like these when sensible people can be forgiven for saying that the boat is not worth the work, and that’s when a chainsaw takes center stage and the resulting rubble is hauled to the dump.
It’s hard to make that choice when much of the boat is in good shape, and when, having been built in 1939, you know that if this boat is trashed there will never be another like it.
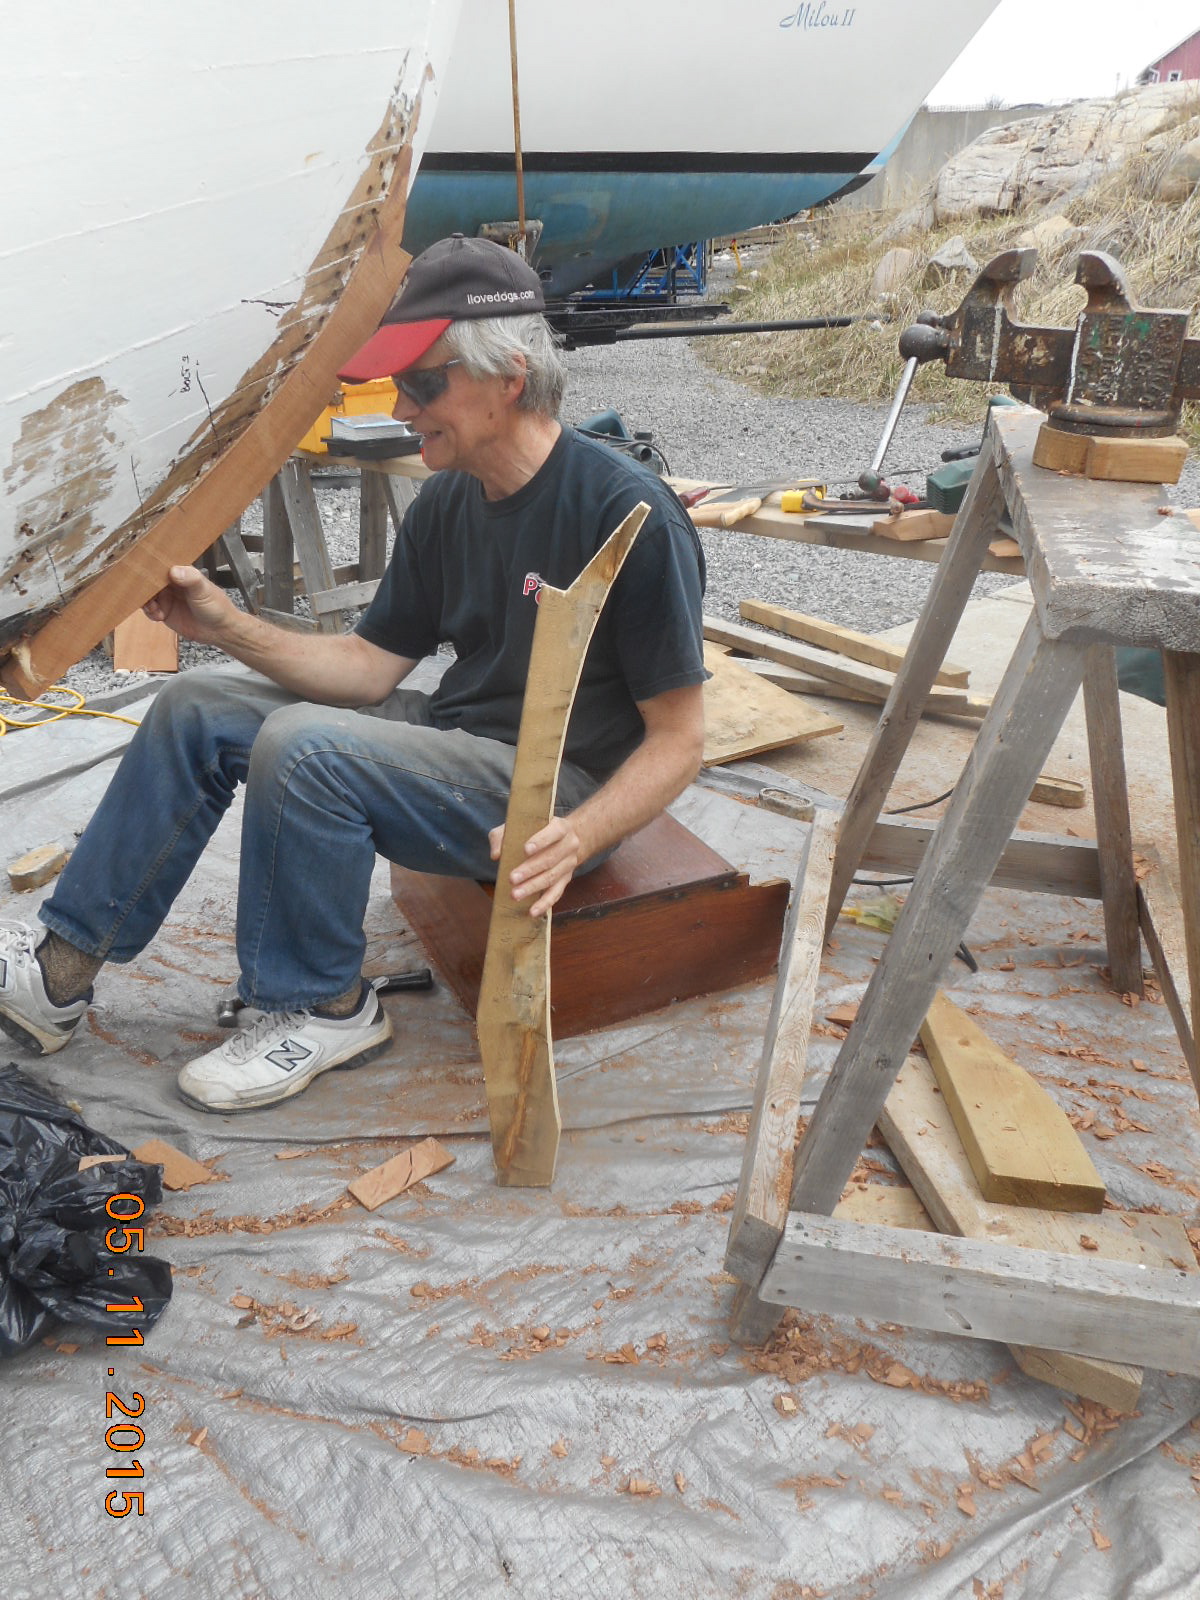
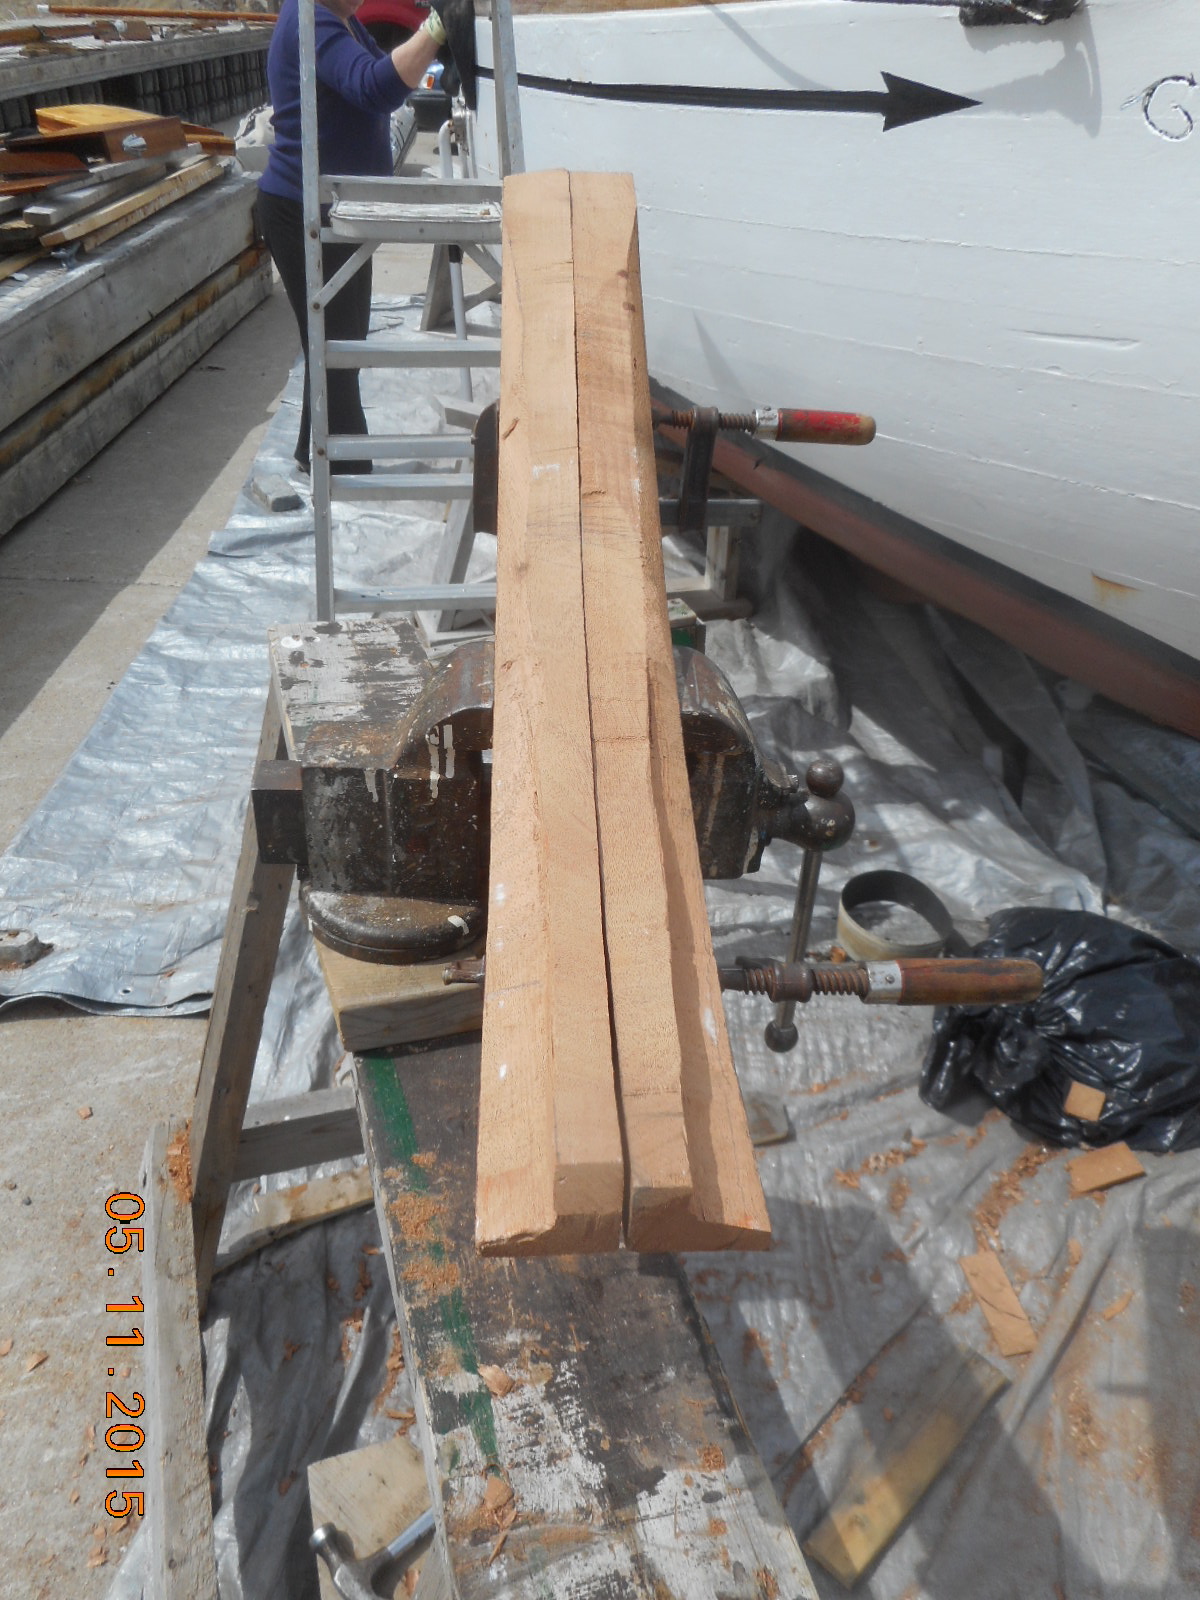
I had to at least try. When my old school closed its wood-working shop I had bought all the leftover wood and had some lovely pieces of 2″ mahogany. The upper stem I had replaced in White Oak but Mahogany is at least as good. The curving bevels for this part were far more complex so I made a pattern out of scrap and had a go. With no plan except the boat the only way forward is to carve a little and fit it in, carve and fit.

The drag is that with every bit of carving you have more invested in the timber you’re cutting, and with every fitting there is the possibility you’ve cut out too much and have to start all over again.
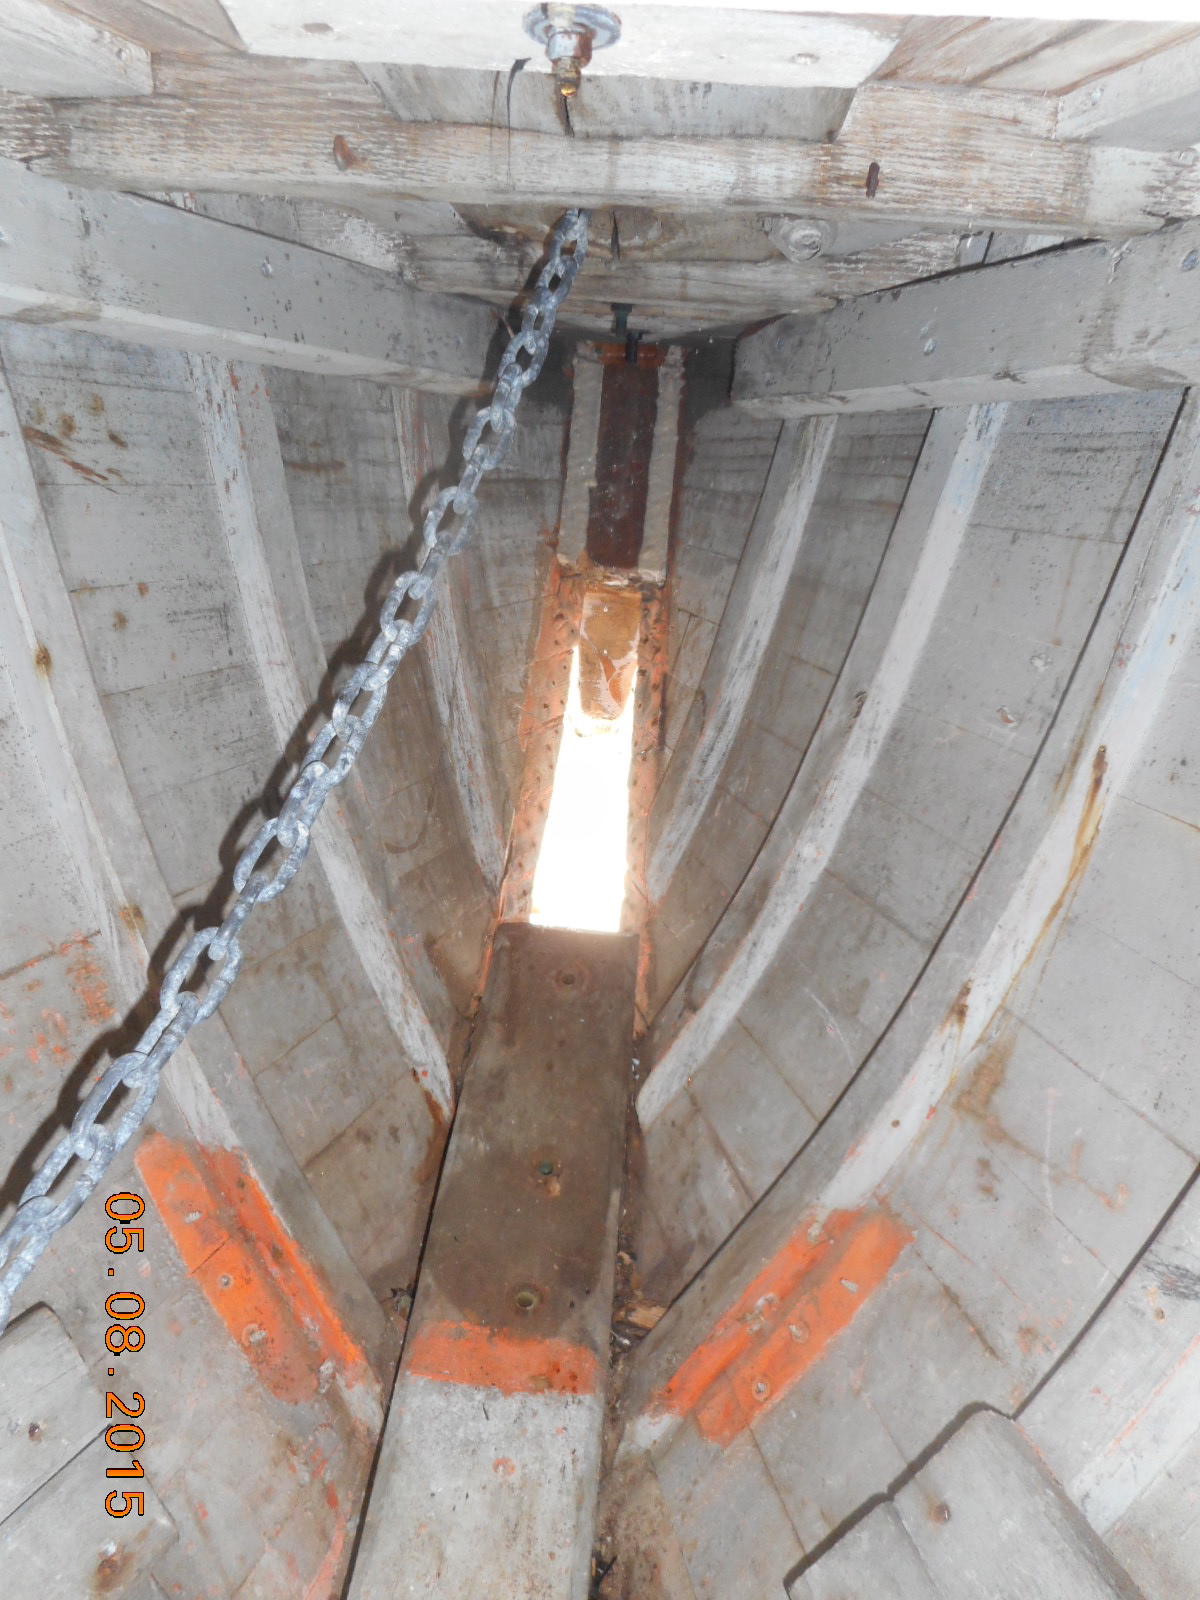
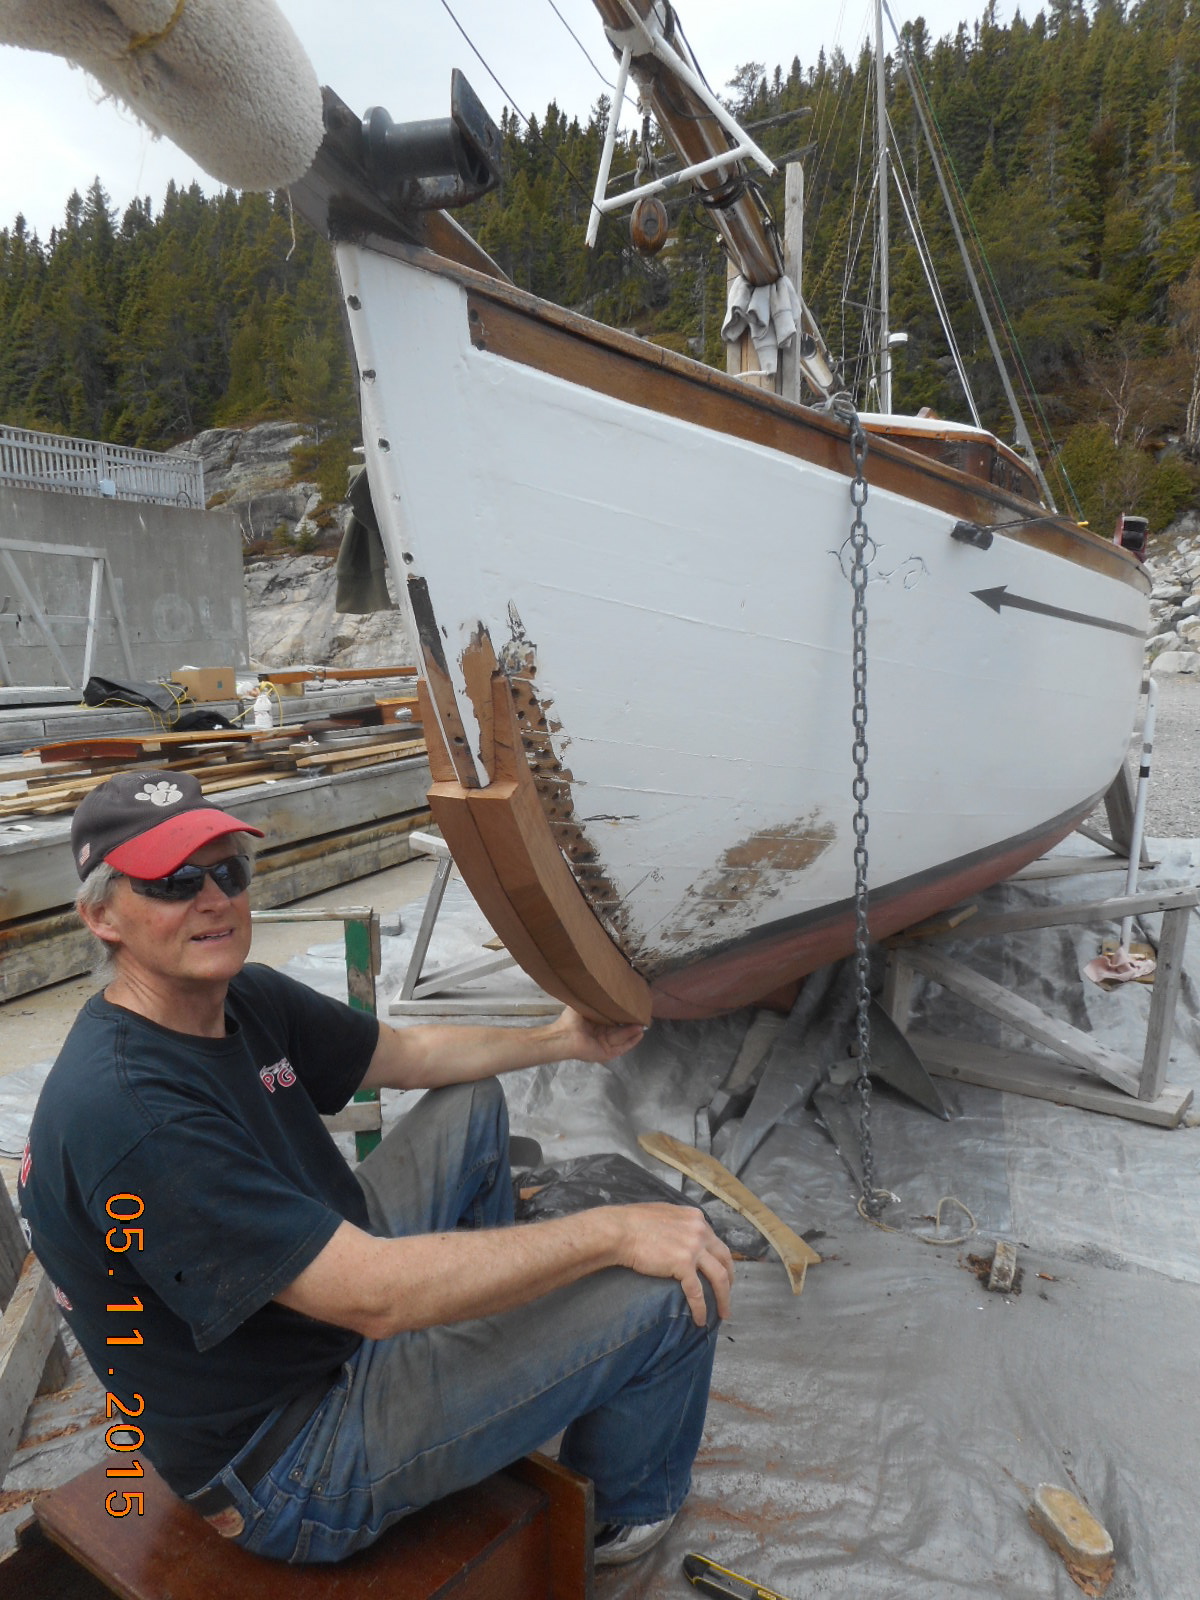
Add to that there is an interior piece which the ends of the planks screw into, and then there is an exterior piece which covers the cut off at the plank ends and that becomes the front of the boat.

Where this would have been one big piece in the original plan, it had to be five pieces here, three to fit in the interior and two mirror image pieces side by side to make the exterior of the stem.
The joy of this nonsense was that of course all the other boat owners were getting their boats ready and they all noticed the rather desperate efforts going on under my boat. Many came to discuss it and see what I was doing and several made it a point to drop by every day to see the progress.
I was relieved that they kept their assessment of my probable sanity to themselves and they were very encouraging about my efforts. One or two are sons of schooner captains from way back and had a pretty good understanding of what I was up to.
As mentioned in an earlier blog this is a tidal dry-dock so you can’t just tell the man in charge that you’re going to delay your launch a week or two. In reality, the tide is in charge, and the rule is that the biggest tide in May is the launch and everyone must go. There’s nothing like a deadline to keep you working hard.
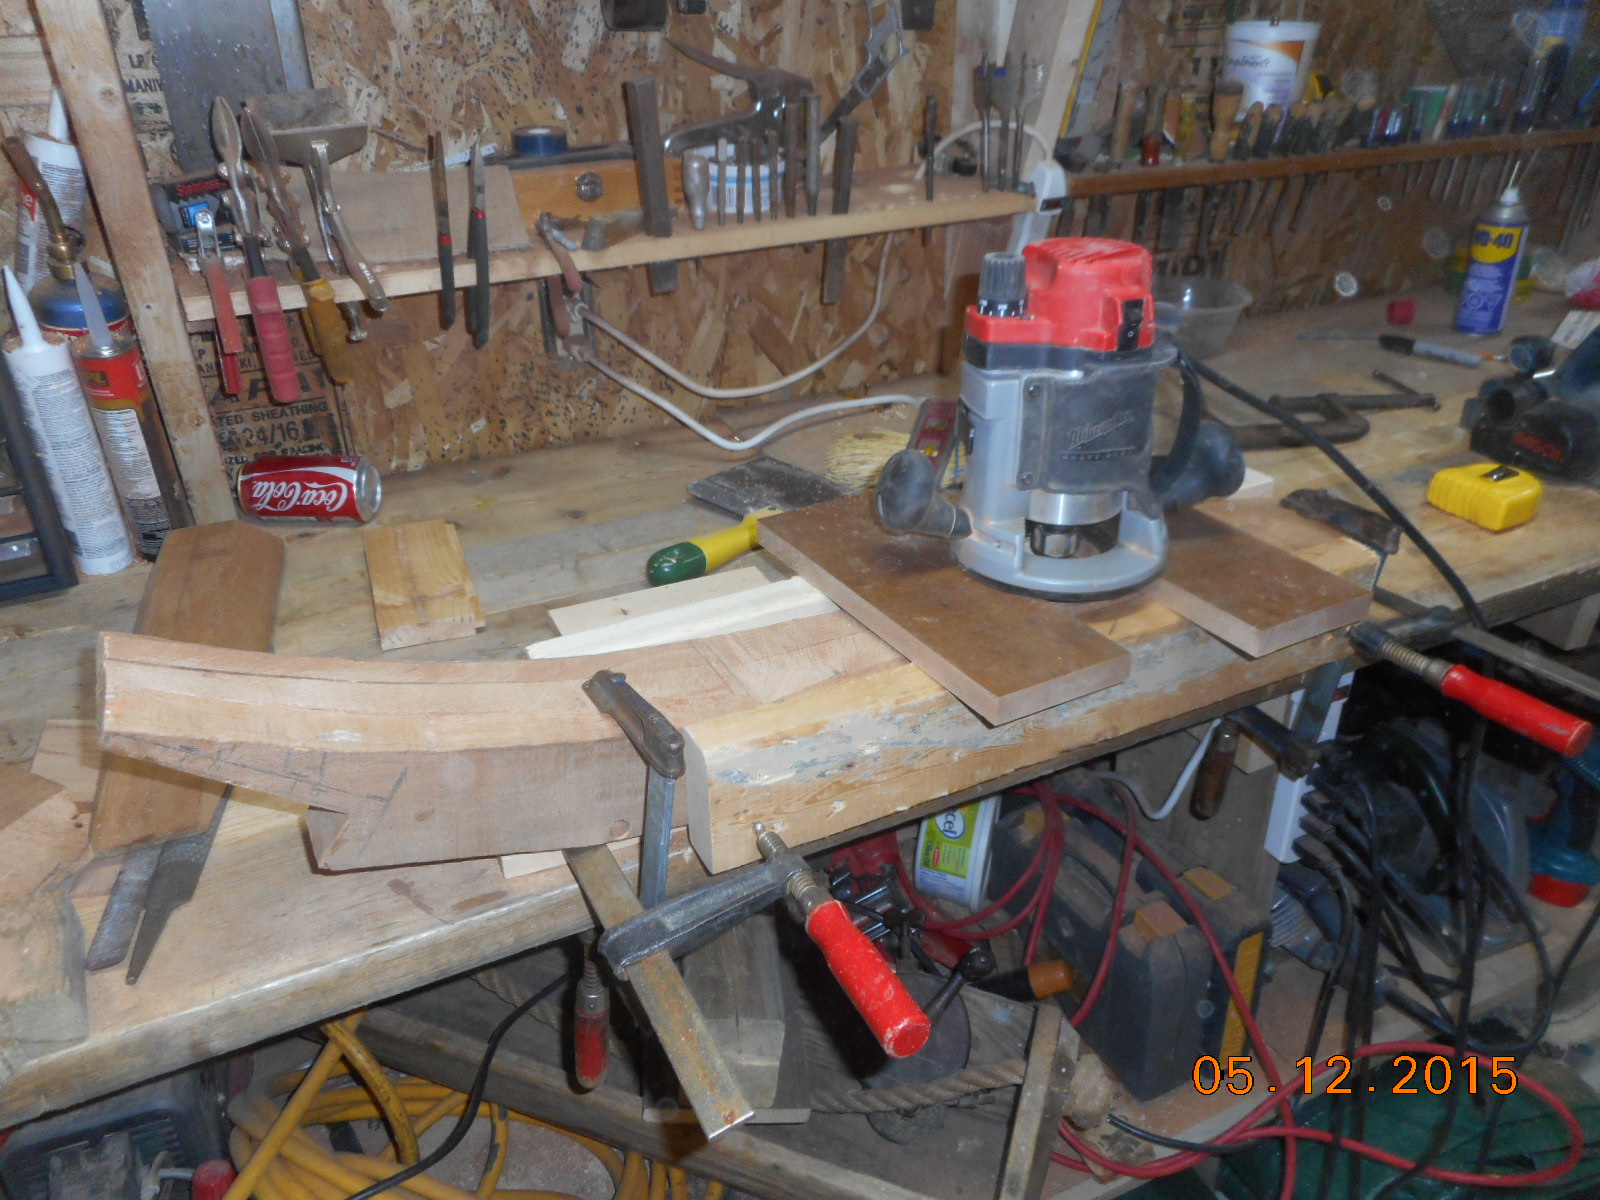
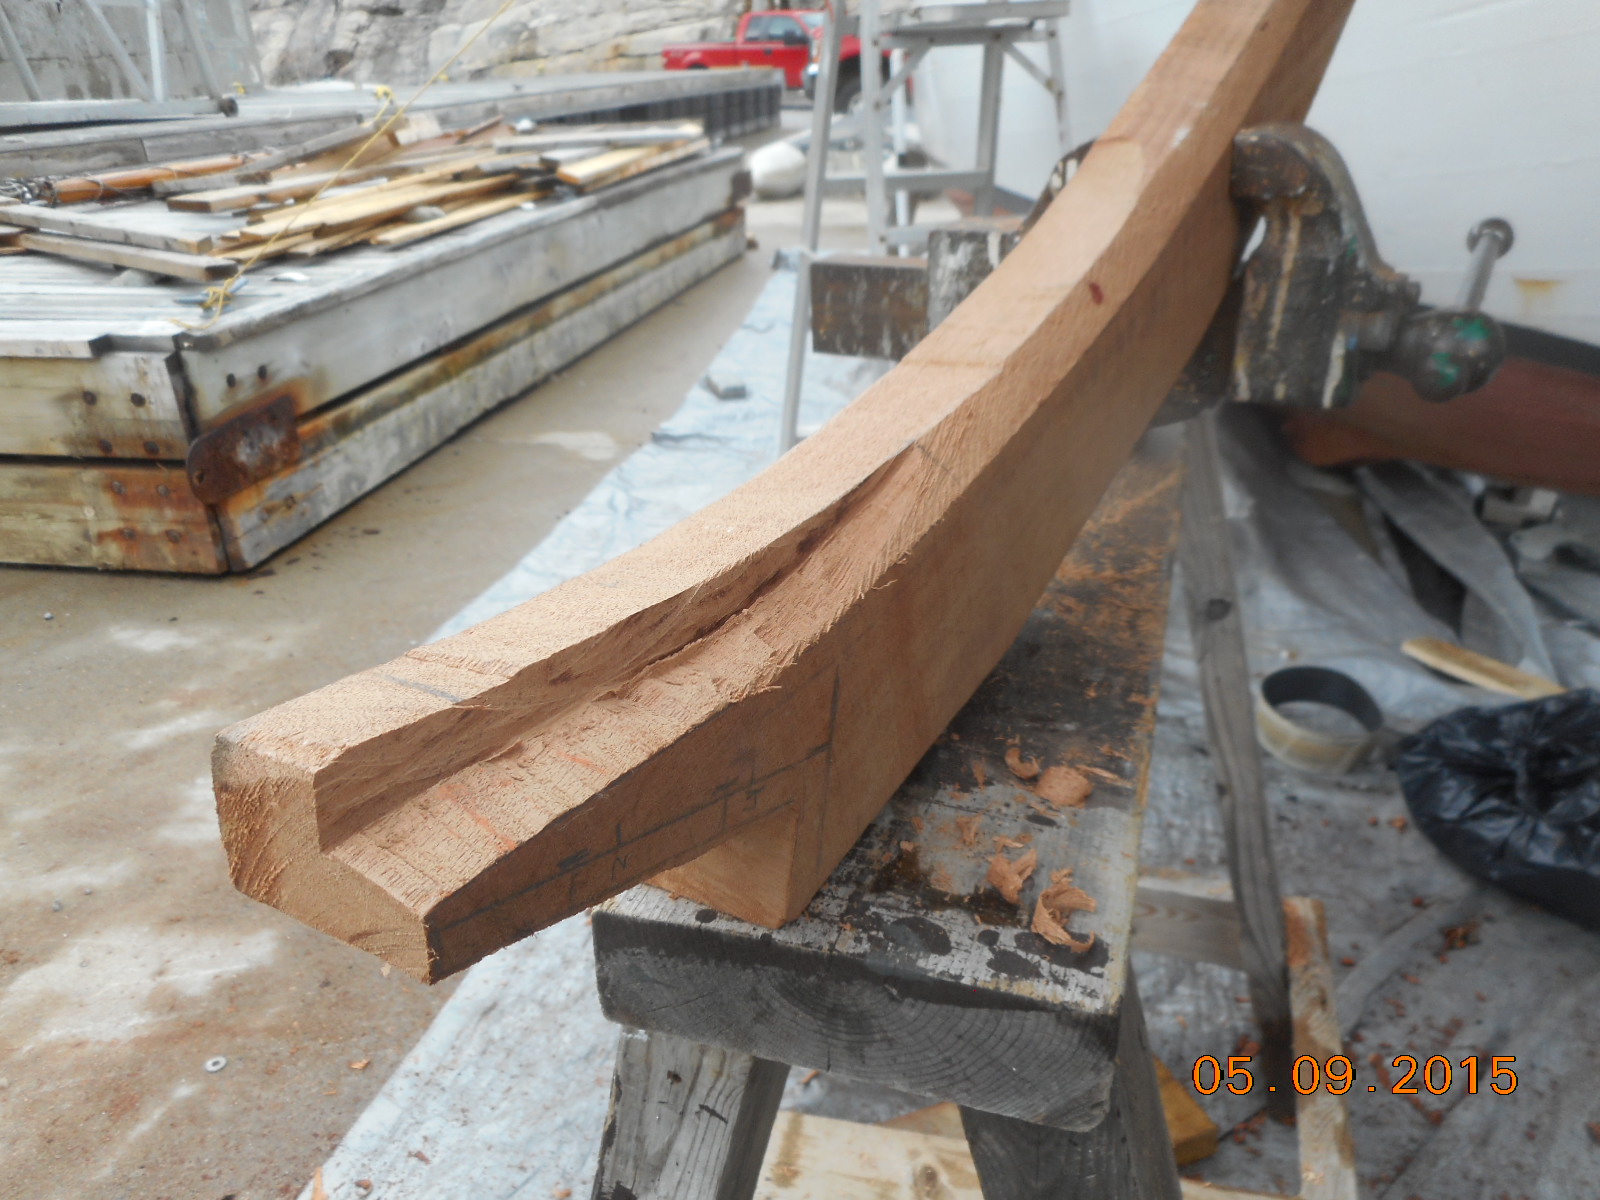
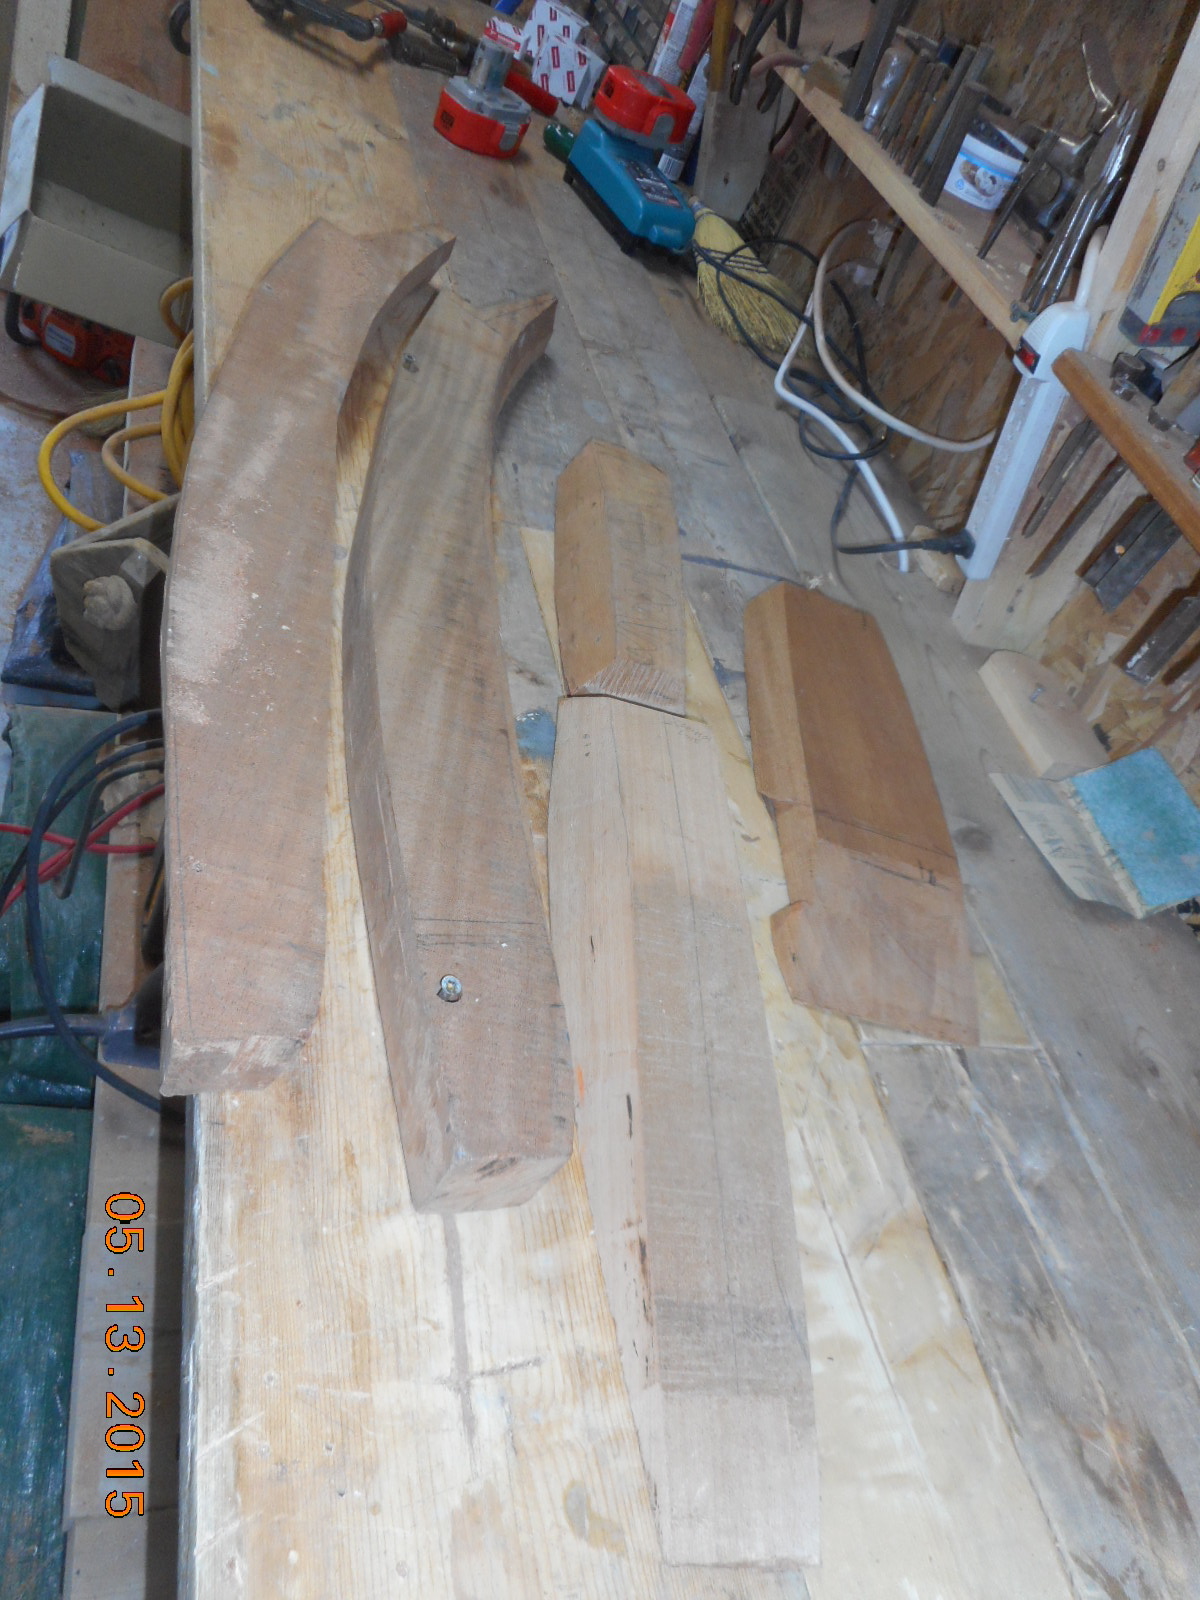
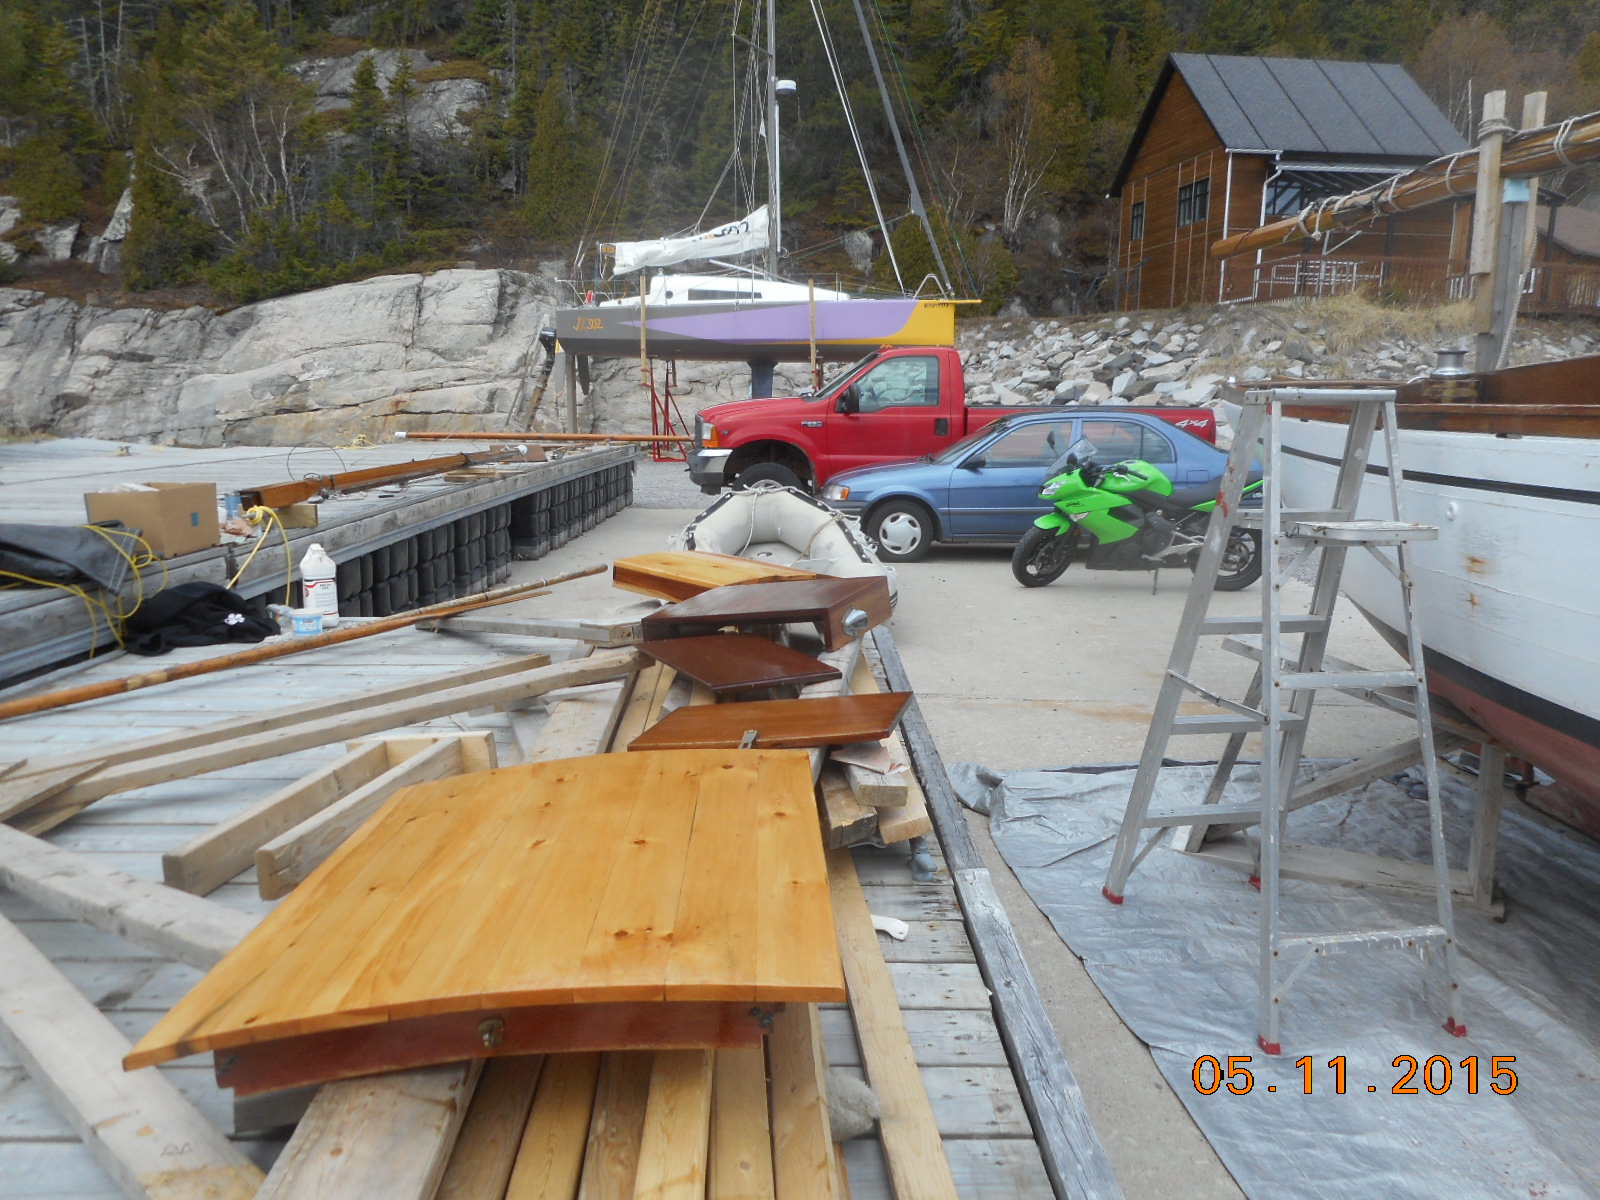
Part of the inside of the exterior stem had to be flat to meet the interior stem pieces. One good way to flatten it when a plane can’t work on an inside curve is to clamp flat wood (2 x 4s in this case) on either side and ride a router along two flat boards to get a very flat surface. Below are all the five pieces enjoying a photo op before installation.

One of the annoying parts for someone with a bad back is crawling right in to the forepeak inside to fit pieces and install bolts to hold the exterior stem on.
Fortunately this led to my meeting Tadoussac’s very capable Massothérapiste who worked wonders reassembling me. She and her husband happened to own the next boat to mine so she had seen the unergonomic way I had been working and knew just what kind of pain to inflict to put me back together.

The other good news is that I had no time to get the varnishing done (of which there is a great deal.) Jane took over that job and it turns out she does a better job than I usually do anyway!
Interior stem installed. Modern epoxies and sealants were used liberally and with no shame in an effort to make up for any and all amateurish carpentry bobos. I did have to caulk a little with traditional cotton to fill gaps but in the end it all came together.

It seems a shame to cut off all the excess wood because it is magnificent mahogany but a boat is supposed to be pointed at the front end and this certainly looks brutally ugly untrimmed!
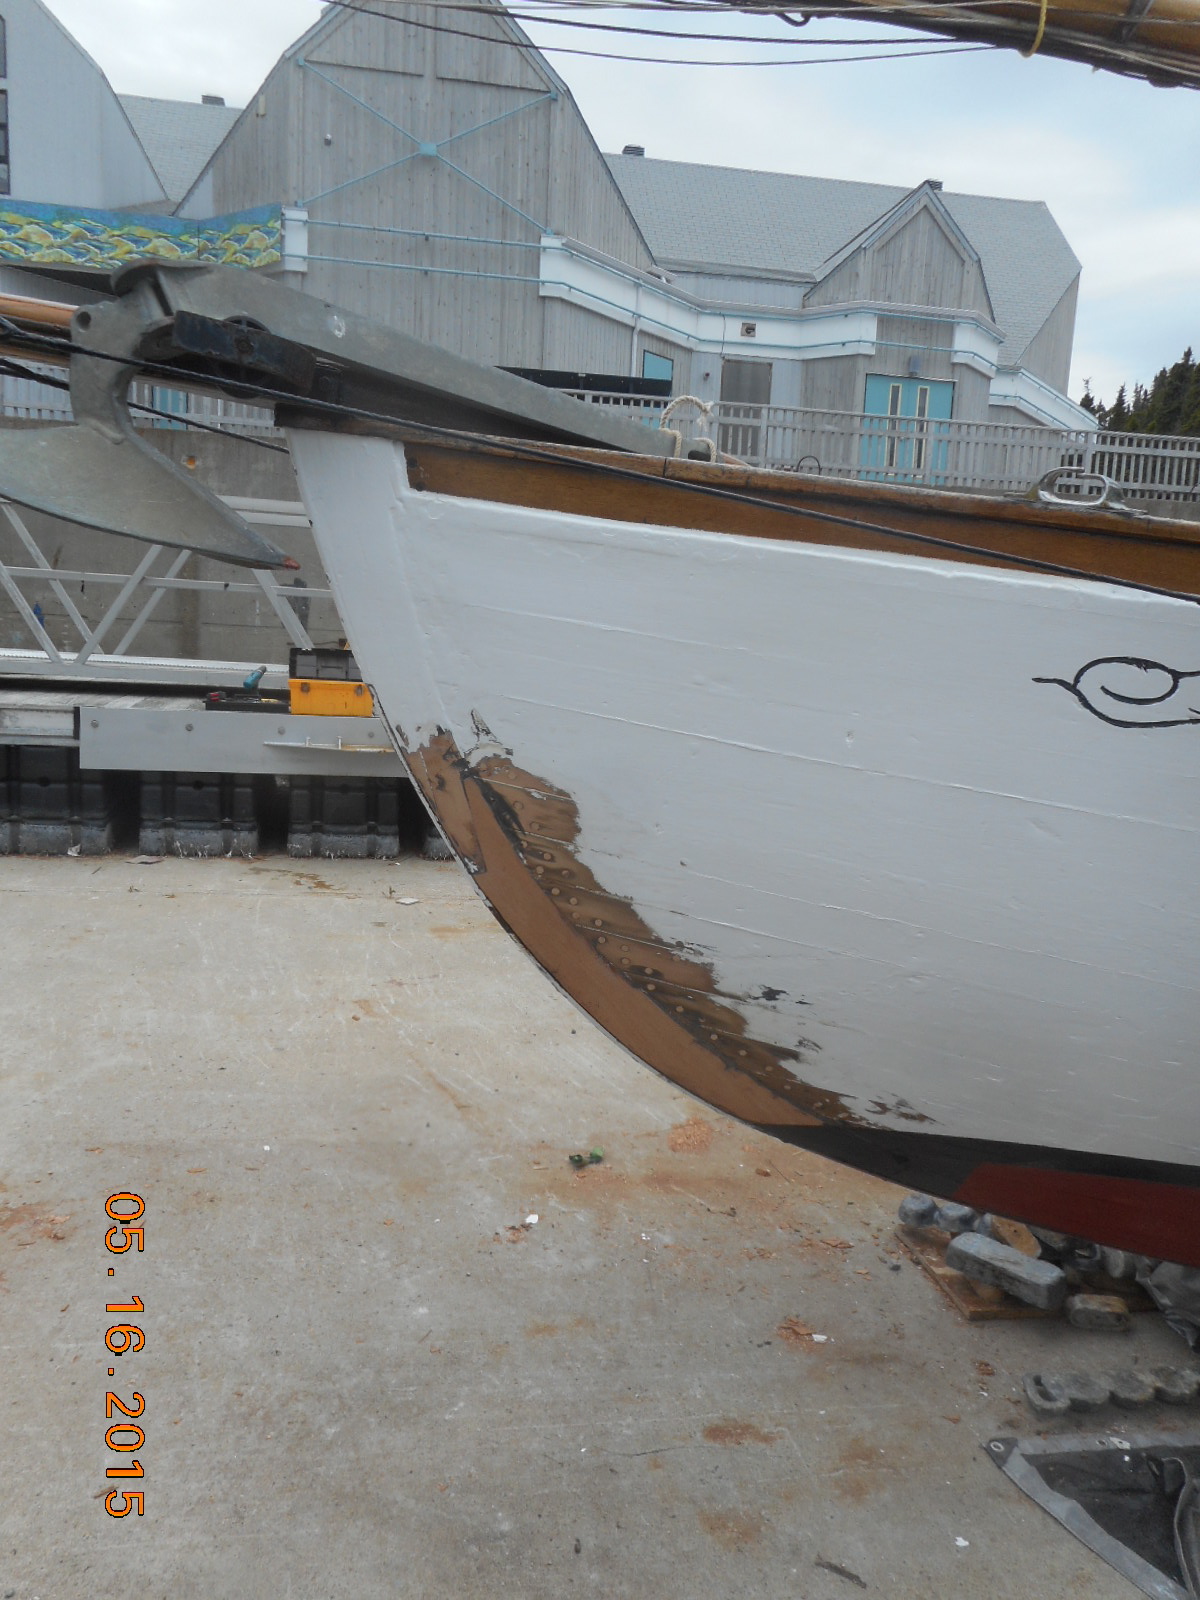
It planed down much more easily than I feared. There’s a metal strip that gets screwed on from the very top down past where the stem connects to the keel so it will be protected.

In the end it looked pretty good and, although it went about 4″ below the waterline, it hasn’t leaked.
It reminds me of an article I once read about someone who had done a much more extensive restoration of an old boat. After detailing everything he’d done someone asked if it had all been worth it now that the boat was operational. He said, “No!”
For me this was worth it, even though most of the marina members now think I’m crazy. But the question is always out there: What’s next and at what point does it stop being worth the effort?
It bears mentioning that every year on launch night the tide floats my boat first because mine is the smallest and shallowest. Every year there is a cheer from the other boat owners when I start my engine and head for the gates. This year they were waiting for it, and the cheer was a whole lot louder and longer than usual!
Looks great Al ! Your daddy would be very, very proud of you !!!
I have being trying to leave a comment for two days but I think Alan is editing my submission.
“Funny, no mention of the post launch. Can you say floating bathtub”
We saw your comments Bill and I loved it. I am working on him to write the next chapter. We actually sailed the other day and it was glorious!!
Bravo Al !!!! A wooden boat, especially of that vintage, is certainly worth the effort. My dad bought a cedar strip boat and had to make cedar strips for shiplapping and replace the transom. He got “taken” when he purchased it so he was out to prove a point, which he did. I also learned how to help with “clinching nails” at a young age.
Congratulations! All shipshape now, eh?
Funny, no mention that she almost sank, post launch, at the marina??
Way to go!!!! Congratulations! :-0
Wow Alan. I’m impressed with all that you did to repair the boat. While it is one thing to see – hey I can do that; it is another different issue and much harder exercise to do and complete correctly. Well done!
Hi Al. Well this confirms all the best and worst things I already know about you: anal, pig-headed, obsessive, misguided, umm, stupid. But boy, that is a nice piece of work, requiring a lot of patience to pull off. I’m impressed.
Personally, I prefer chainsaws.
I will reserve my full kudos until this summer when I will drive the boat into something solid to test both your workmanship and our friendship.
I suspect it will test friendship!!!!
No doubt!!